Part 1 - Idea's Generation ***********************************************************************************
My friends, Yogi & Abi will be going to Bangalore this Sat. I feel very sad. I won't have anyone to chat & disturb for 3 months..what a torture. I have made these cards for both of them. I spent approximately 1 day doing it.
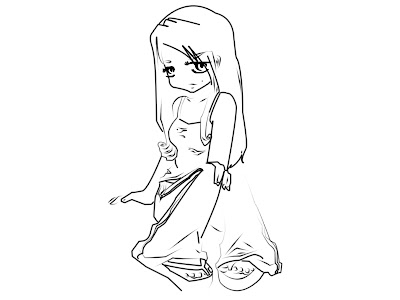
These cards are easy to make. What you need is get a couple of ideas & send them running. I have drew a few images that I wanted to use in my cards. Then, starts get crazy sticking & gluing things on the card. Not to forget, choose the color of the cards that you want to work on.
No limits, no boundaries just do what you feel like doing until you have expressed on the ideas you have in your mind. Get some ribbons & gold dust if you want to put them in as well.
Part 2 - Gluing, Pasting & Have Fun*************************************************************************************
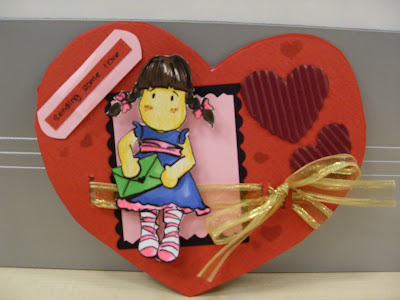
This is Yogi's card. I have made a heart shape card. First of all, before I get started, I have been searching high & low for blade. Don't have 1 that time. I poke a few rectangular holes on the card so that I can put in the ribbon (a gold ribbon actually :P) After that, I paste some paper that I have cut using my newly bought pattern scissors. Notice I have pasted some hearts on the card. Lastly, paste the girl & the 'Sending some love' tag on the left hand corner. Tada..there you have it a beautiful handmade card for your friend. Don't forget to drop a few words in the card for them...
This is the card for Abi. This card I have made it as into an envelope. First of all, I have folded the card. Then, I have pasted 2 ribbons on the card. After that, I have pasted the paper that I have cut using the pattern scissors on it. On top of the paper, I have glued a fake ribbon. Lastly, I glued the girl & flowers (made by myself) plus doodle some flowers on the card. Not to mention, scribbled a few words in the card.
 Part 3 - Happy Moments
 *************************************************************************************
This is my friends reaction when they received the cards...happy I guess. Actually is not a guess, they were actually happy. You can see it on their face. Me too were happy. Sometimes, when you give something that you have spent so much time making it to the people tat you planned to give, you will a lso feel that happiness surrounding you. :p
 Yogi
Yogi Abi
Abi(she posed a few times taking this photo after I told her that I will be uploading this here..)
Here are the picture of Yogi, Abi & I with their cards...Gonna miss them especially Abi coz I got to tease her. hahaha...


Material (s) Used: Pencil, paper, Copic markers, color pencils, Pilot G-1 pen, ribbons, lots of color papers
Tool (s) Used: Samsung camera (Abi's)


 Material (s) Used: Paper,pencil

 A girl, a boy & a cat
 A monkey
 A rabbit & chicks
 Handmade craft
 A puppy
 Handmade Valentine's Card
 Material (s) Used: Paper, pencil, crayon
 The front view of the Card
 Upclose of the owl & girl image
 Upclose of the girl & bus stop sketches
 Swee Ling, me & her Card

 Yogi
Yogi Abi
Abi

 DIY Flowers
 The Snowman
 The Card


 Material(s) Used: Pencil, Sony Ericsson hp
 Material(s) Used: Pencil, paper, Pilot G-1 pen, Copic markers, Sony Ericsson hp


 My first comic illustration...the background i got it from internet. I have combined a few background with my illustration. Both the boy & gal i did it on my own.